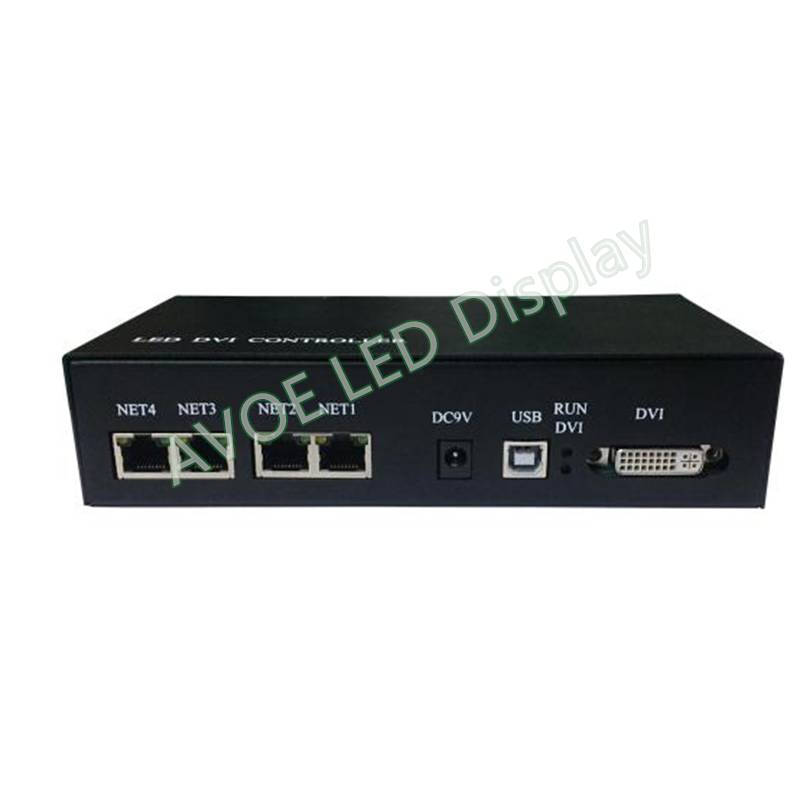
H803TV LED Controller
H803TV can drive the following chips: LPD6803, LPD8806, LPD1882, LPD1889, LPD6812, LPD1883, LPD1886, DMX512, HDMX , APA102, MY9221, DZ2809, SM16716, SM16711, UCS6909, UCS6912, UCS1903, UCS1909, UCS1912, WS2801, WS2803, WS2811, INK1003, TM1812, TM1809, TM1804, TM1803, TM1913, TM1914, TM1926, TM1829, TM1906, TM1814, BS0901, BS0902, BS0825, BS0815, LY6620, BS0825, LD1510, LD1512, LD1530, LD1532, TLS3001, TLS3002, DM412, DM413, DM114, DM115, DM13C, DM134, DM135, DM136, MBI6023, MBI6024, MBI5001, MBI5168, MBI5016, MBI5026, MBI5027, 74HC595, 6B595, TB62726, TB62706, ST2221A, ST2221C, XLT5026, ZQL9712, ZQL9712HV, HEF4094, A8012, etc.
(1). Each H803TV drives maximum 400000 pixels with four output network ports; each port drives maximum 100000 pixels.
(2). Four ports are separated and configured individually, which means four ports can drive different chips. Four ports control 1020 slave controllers in total, each ports control 255 slave controllers.
(3). Connect video splitter to control part of the video section by section.
(4). Support the following resolutions: 1024X768, 1280X720, 1280X960, 1280X1024, 1360X765, 1360X1020, 1600X900, 1600X1200.
(5). Screen refresh frequency is recommended to set to 60HZ.
(6). Support single channel, double channel lamps.
(7). Use the autorun USB to transmit and control data, which is applied to both 32-bit and 64-bit operating systems
(8). Data is transmitted based on standard Ethernet protocol and the transmission distance is up to 100 meters.
(1). After power-on, connect computer USB interface to H803TV USB port with USB cable, connect H801TV DVI port to computer DVI or HDMI interface with DVI cable, computer can detect the device automatically. Neither 32-bit operating system nor 64-bit operating system need to install USB driver.
(2). Right-click desktop—“NVIDIA control panel”, click “set up multiple monitors”, select “duplication mode”, then click “apply”, DVI indicator light will flash. Modify resolution, which must be compatible with two monitors.
(3). In “LED Studio Software”, click menu “setting”-“system setting”—“Software Setting”—“Hardware interface”, select “H803TV-DVI”, click “OK”, and then restart the software.
(4). Each H803TV drives maximum 400000 pixels with four network output ports, each network port drives maximum 100000 pixels and connects maximum 255 slave controllers. The more pixels that each slave controller drives, the less slave controller that each network port of H803TV controls.
(5). H803TV can output to H803TC directly in order to realize the online or offline function. You can connect H803TV to photoelectric converter via IP switch, then connect to slave controller to prolong distance.
(6). The red light: on: power is on, flash: DVI communication correctly. The green light: off: load sculpt failed, flash: controller working normally.
(7). Only when setting system or setting sculpt does computer send configuration data to H803TV through USB interface. So, after setting the parameters, USB cable can be unplugged. Do not move the playing window if no special needs, click menu “setting”—“play window setting”—“lock play window” in software.

Connect a H803TV

Connect multiple H803TVs with DVI distributor
DVI cable, USB cable, DC 9V power supply
|
Input Voltage |
DC9V |
|
Power Consumption |
5W |
|
Control pixels |
400000 pixels, a computer controls 3.84 million pixels |
|
Weight |
0.8Kg |
|
Working Temperature |
-20C°--75C° |
|
Dimension |
L183 x W139 x H40 |
|
Carton Dimension |
L205 x W168 x H69 |

